Notes on Trying React Native Mobile Development with the Expo Framework
January 26, 2026Elecmonkey
This article was translated by AI and has not been manually reviewed.
I have absolutely no mobile development experience or knowledge, and I have never touched Kotlin or Swift. This is purely a record of the process I eventually got working.
Creating the Project
pnpx create-expo-app@latest
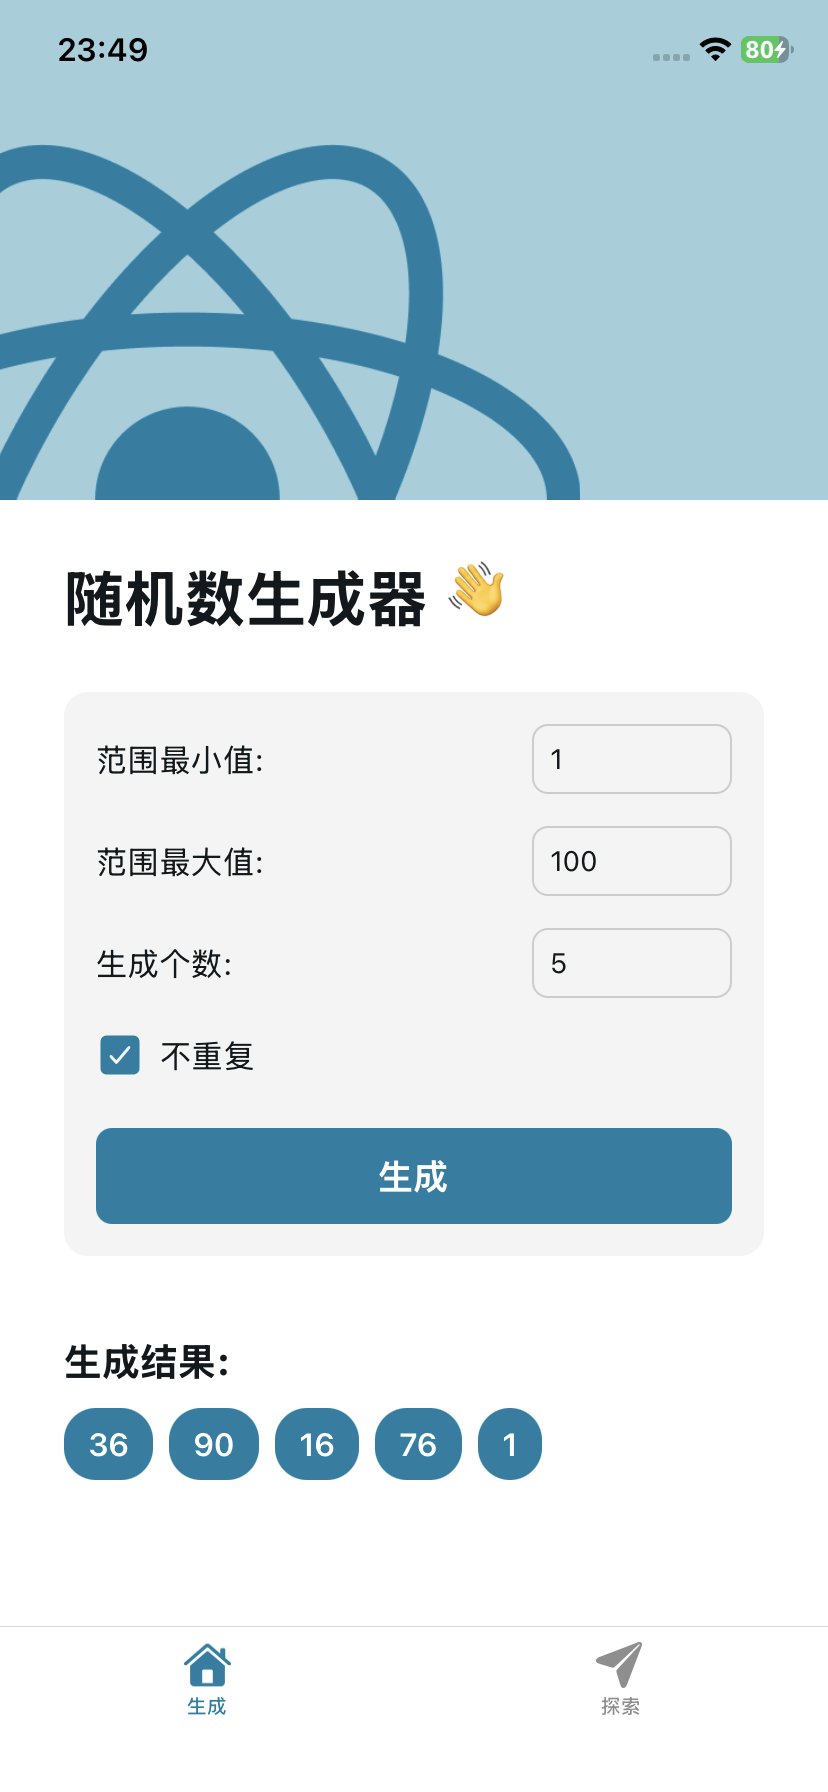
Create a demo project, then let AI casually modify it a bit, rename it, and make a small demo that generates random numbers.
Add the following script to package.json:
"web": "expo start --web"
Run:
pnpm web
Open the browser. If there are no major problems, use this demo for testing.
Android Side
Running on an Android Emulator
Install Android Studio! When Android Studio is opened for the first time, it will prompt you to install the Android SDK. I downloaded Android API 36, which seems to be the latest, though I am not very sure what range of Android versions it corresponds to.
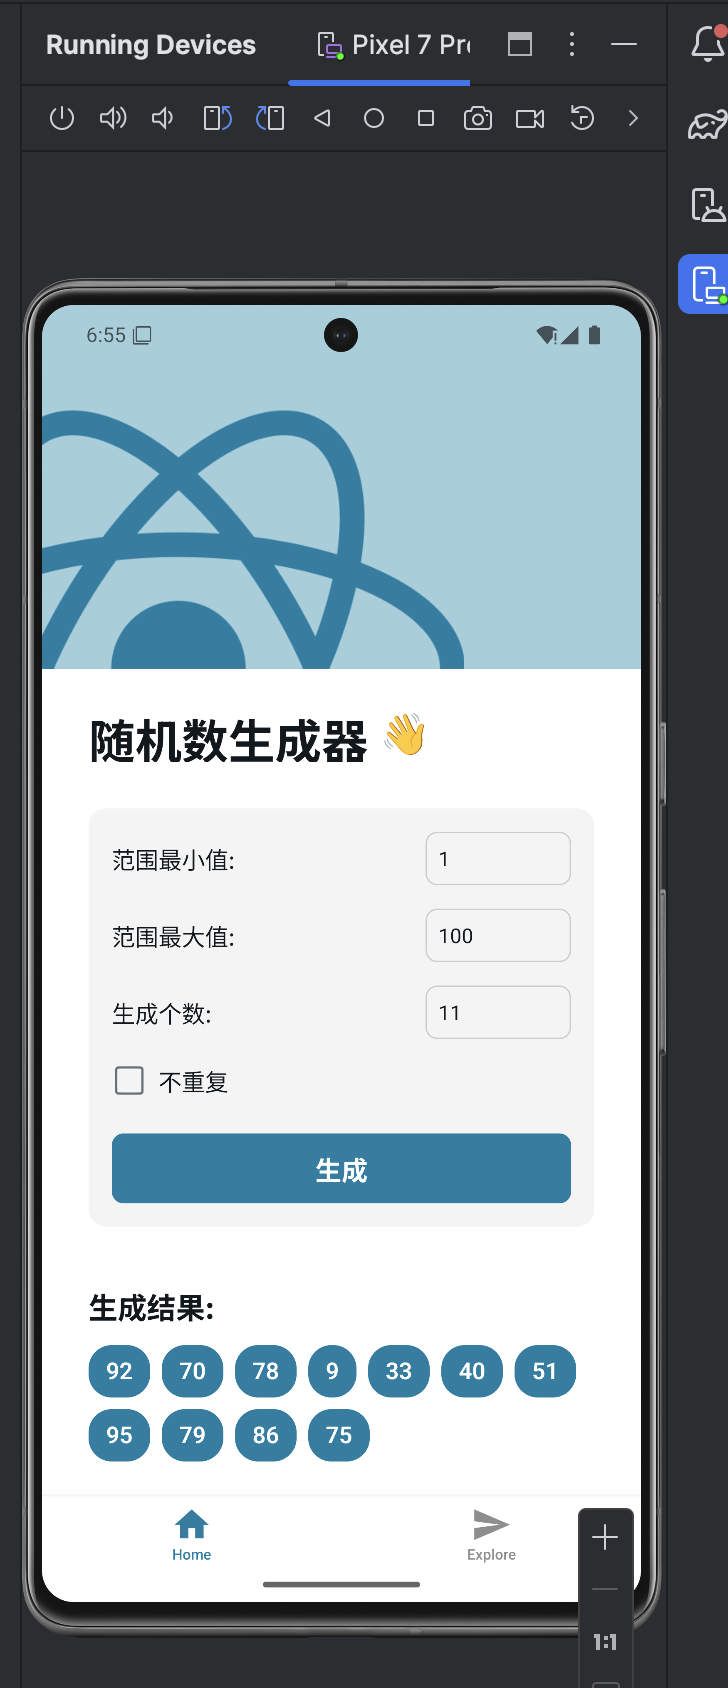
Then find Tools -> Device Manager at the top, create an Android phone emulator. I chose Pixel 7 Pro, API 36. Start the emulator and leave it running for later.
package.json should have this by default:
"ios": "expo run:android"
So run:
pnpm android
If the emulator from earlier is running normally in the background, this step should connect to it. The first time requires waiting for Expo Go to be installed automatically, and there is a progress bar so you can watch it move. After it finishes:
Running on a Real Android Device
Expo officially provides a hosted build service called EAS (Expo Application Services), which can directly build apk and ipa files (the latter requires a 99-dollar developer account). But Android is not that strict, so you can directly use EAS's free quota.
# Install the EAS command-line tool
pnpm add -g eas-cli
# Log in to your Expo account
eas login
Log in to your Expo account,
eas build:configure
It will ask: Which platforms would you like to configure for EAS Build? Choose Android. This step will generate eas.json.
eas build -p android --profile preview --clear-cache
Fill in some signing-related information according to the prompts. The local cli may keep getting stuck (if the network is not very stable). At this point, open your own expo.dev dashboard, find this build task, and you can find the apk download link after the build succeeds. Download it and transfer it to the phone for installation.

iOS Side
Running on an iOS Simulator
Go to the App Store and download a relatively new Xcode version. (For this, I was even forced to upgrade macOS first... It should now be the latest minor version of Sequoia. I really have some resistance to the Liquid Glass of macOS 26 Tahoe...)
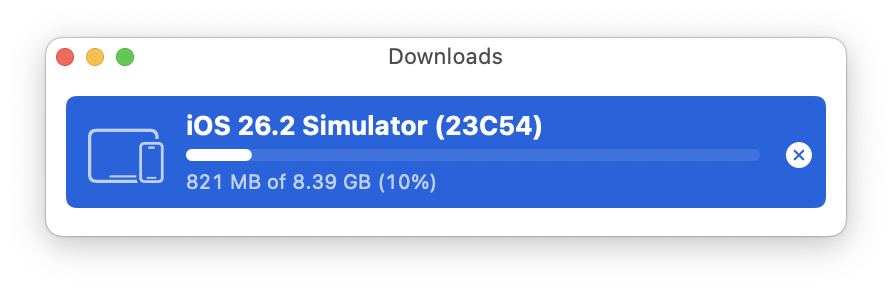
Xcode includes iOS Simulator. You need to download a simulator image in advance. I tentatively downloaded iOS 26.
package.json should have this by default:
"ios": "expo run:ios"
So run:
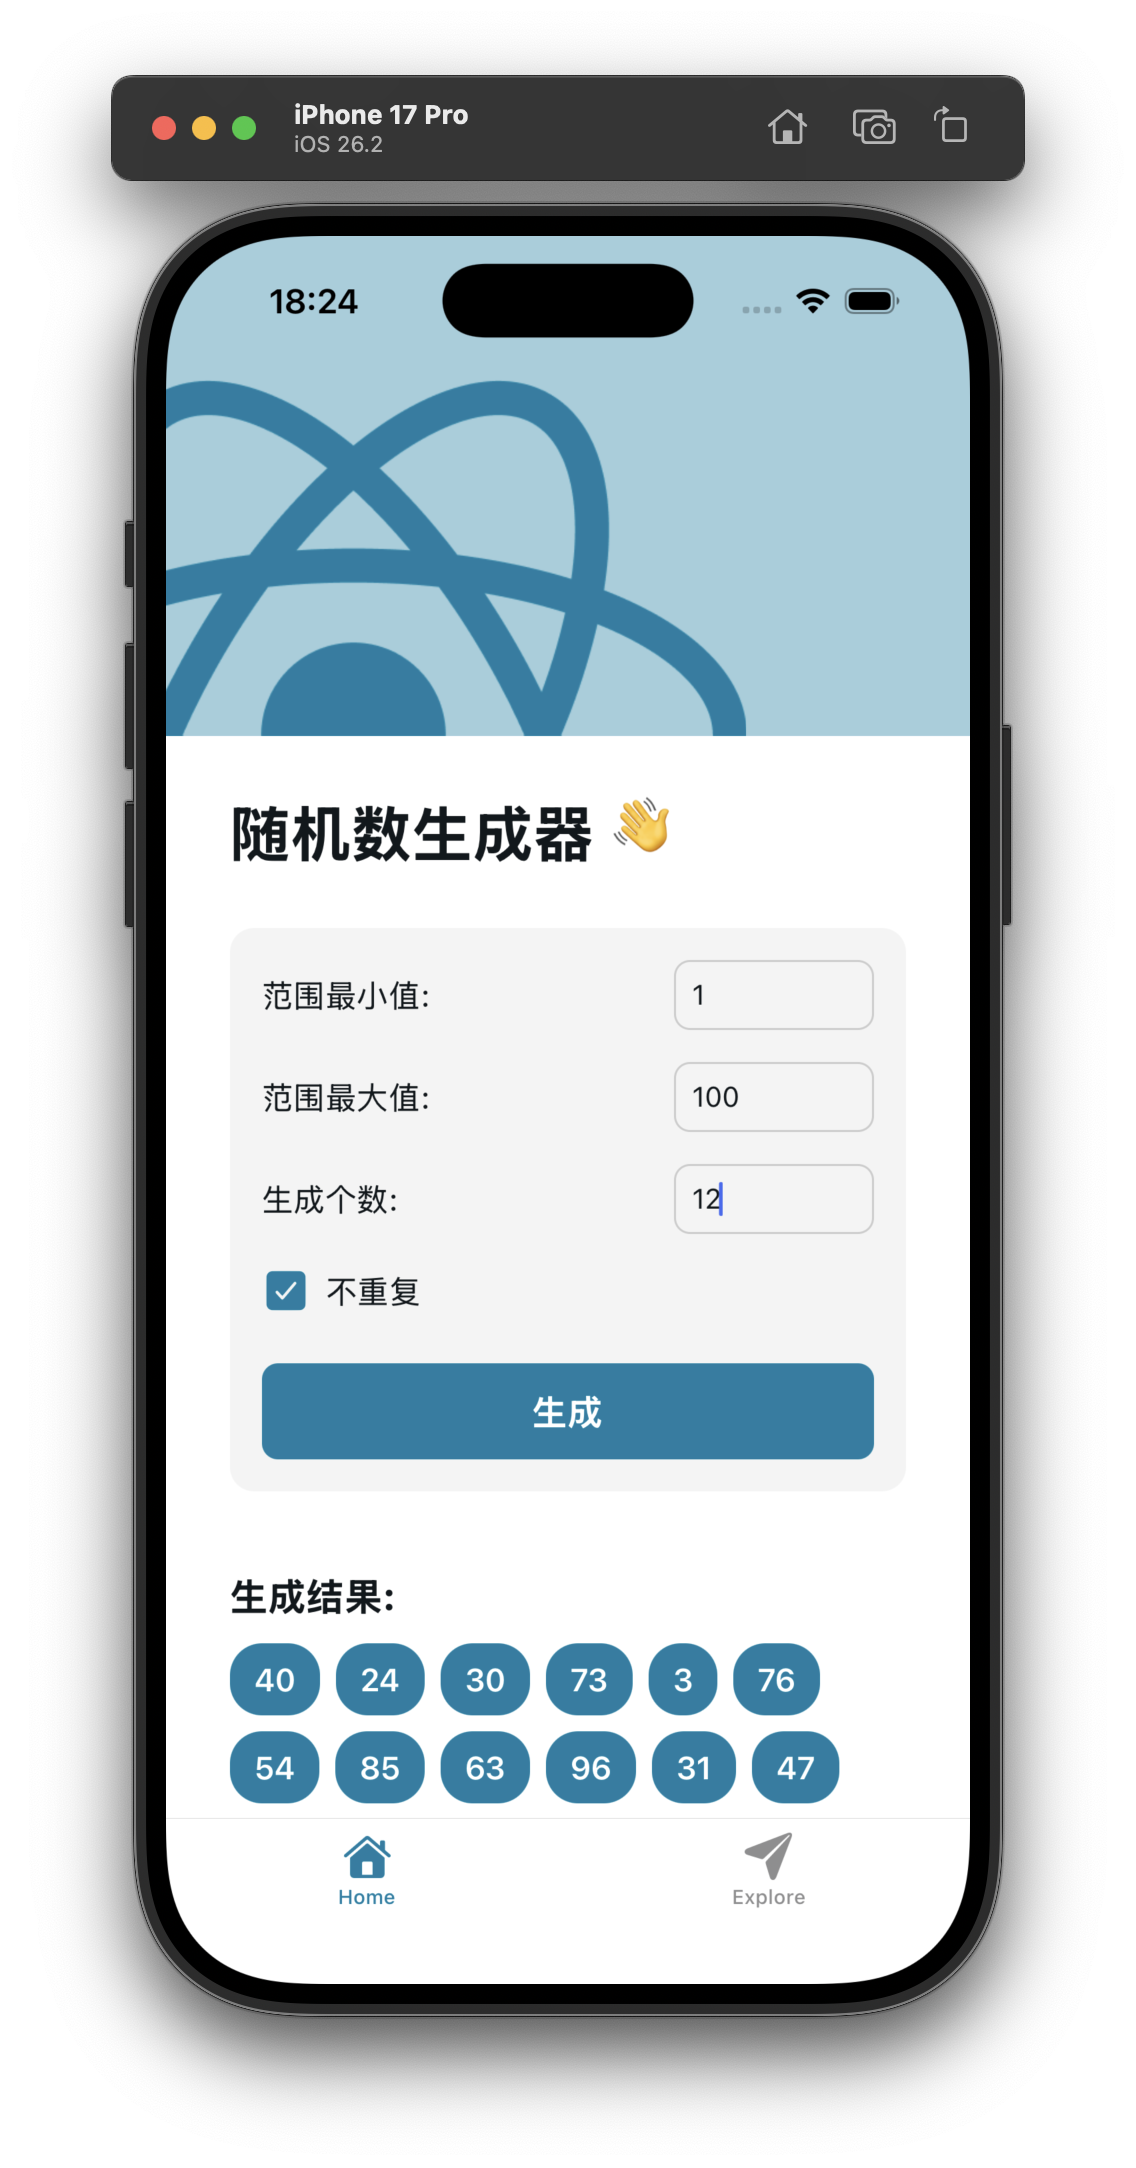
pnpm ios
macOS will automatically open iOS Simulator. The first launch requires waiting for Expo Go to be installed automatically. It also should not take too long, and there is a progress bar so you can watch it move. After it finishes:
Running on a Real iOS Device
First of all, because I do not have a 99-dollar Apple Developer account, I cannot use the hosted service provided by Expo to build. I can only build locally with Xcode, connect a cable, and install it on my own iPhone in developer mode.
First, on the Expo side, prebuild and package the JavaScript code,
Add two scripts to package.json yourself:
"prebuild": "expo prebuild",
"export": "expo export",
Run:
pnpm prebuild
pnpm export
prebuild will generate the ios and android directories, containing native project code that can be opened with Xcode and Android Studio. export packages the JavaScript code for use by the native project.
At this point we need to install the relevant native dependencies for iOS development.
brew install cocoapods
Then enter the ios directory and run:
pod install
The installation process seems to pull resources from GitHub, so pay attention to the network situation. After it completes successfully, app.xcworkspace will appear under the ios directory. This is what we need to open with Xcode. Use Finder to enter the ios directory and double-click app.xcworkspace.
Now we are in Xcode!
Set your developer identity information. In TARGETS -> app -> Signing & Capabilities, select your Apple ID account and change Team to your Apple ID (Personal Team). If this step is not set, you cannot build later. Bundle Identifier needs to be a unique identifier like com.yourname.appname, and it will automatically use the one from the React Native project.
Connect the iPhone and choose the real device as the run target. The first time you connect, the phone needs to enable developer mode and follow the prompts to trust everything. I cannot remember the exact process clearly, but the system prompts are very clear, and I did not need extra help from search engines or AI. Some prompts are only in English.
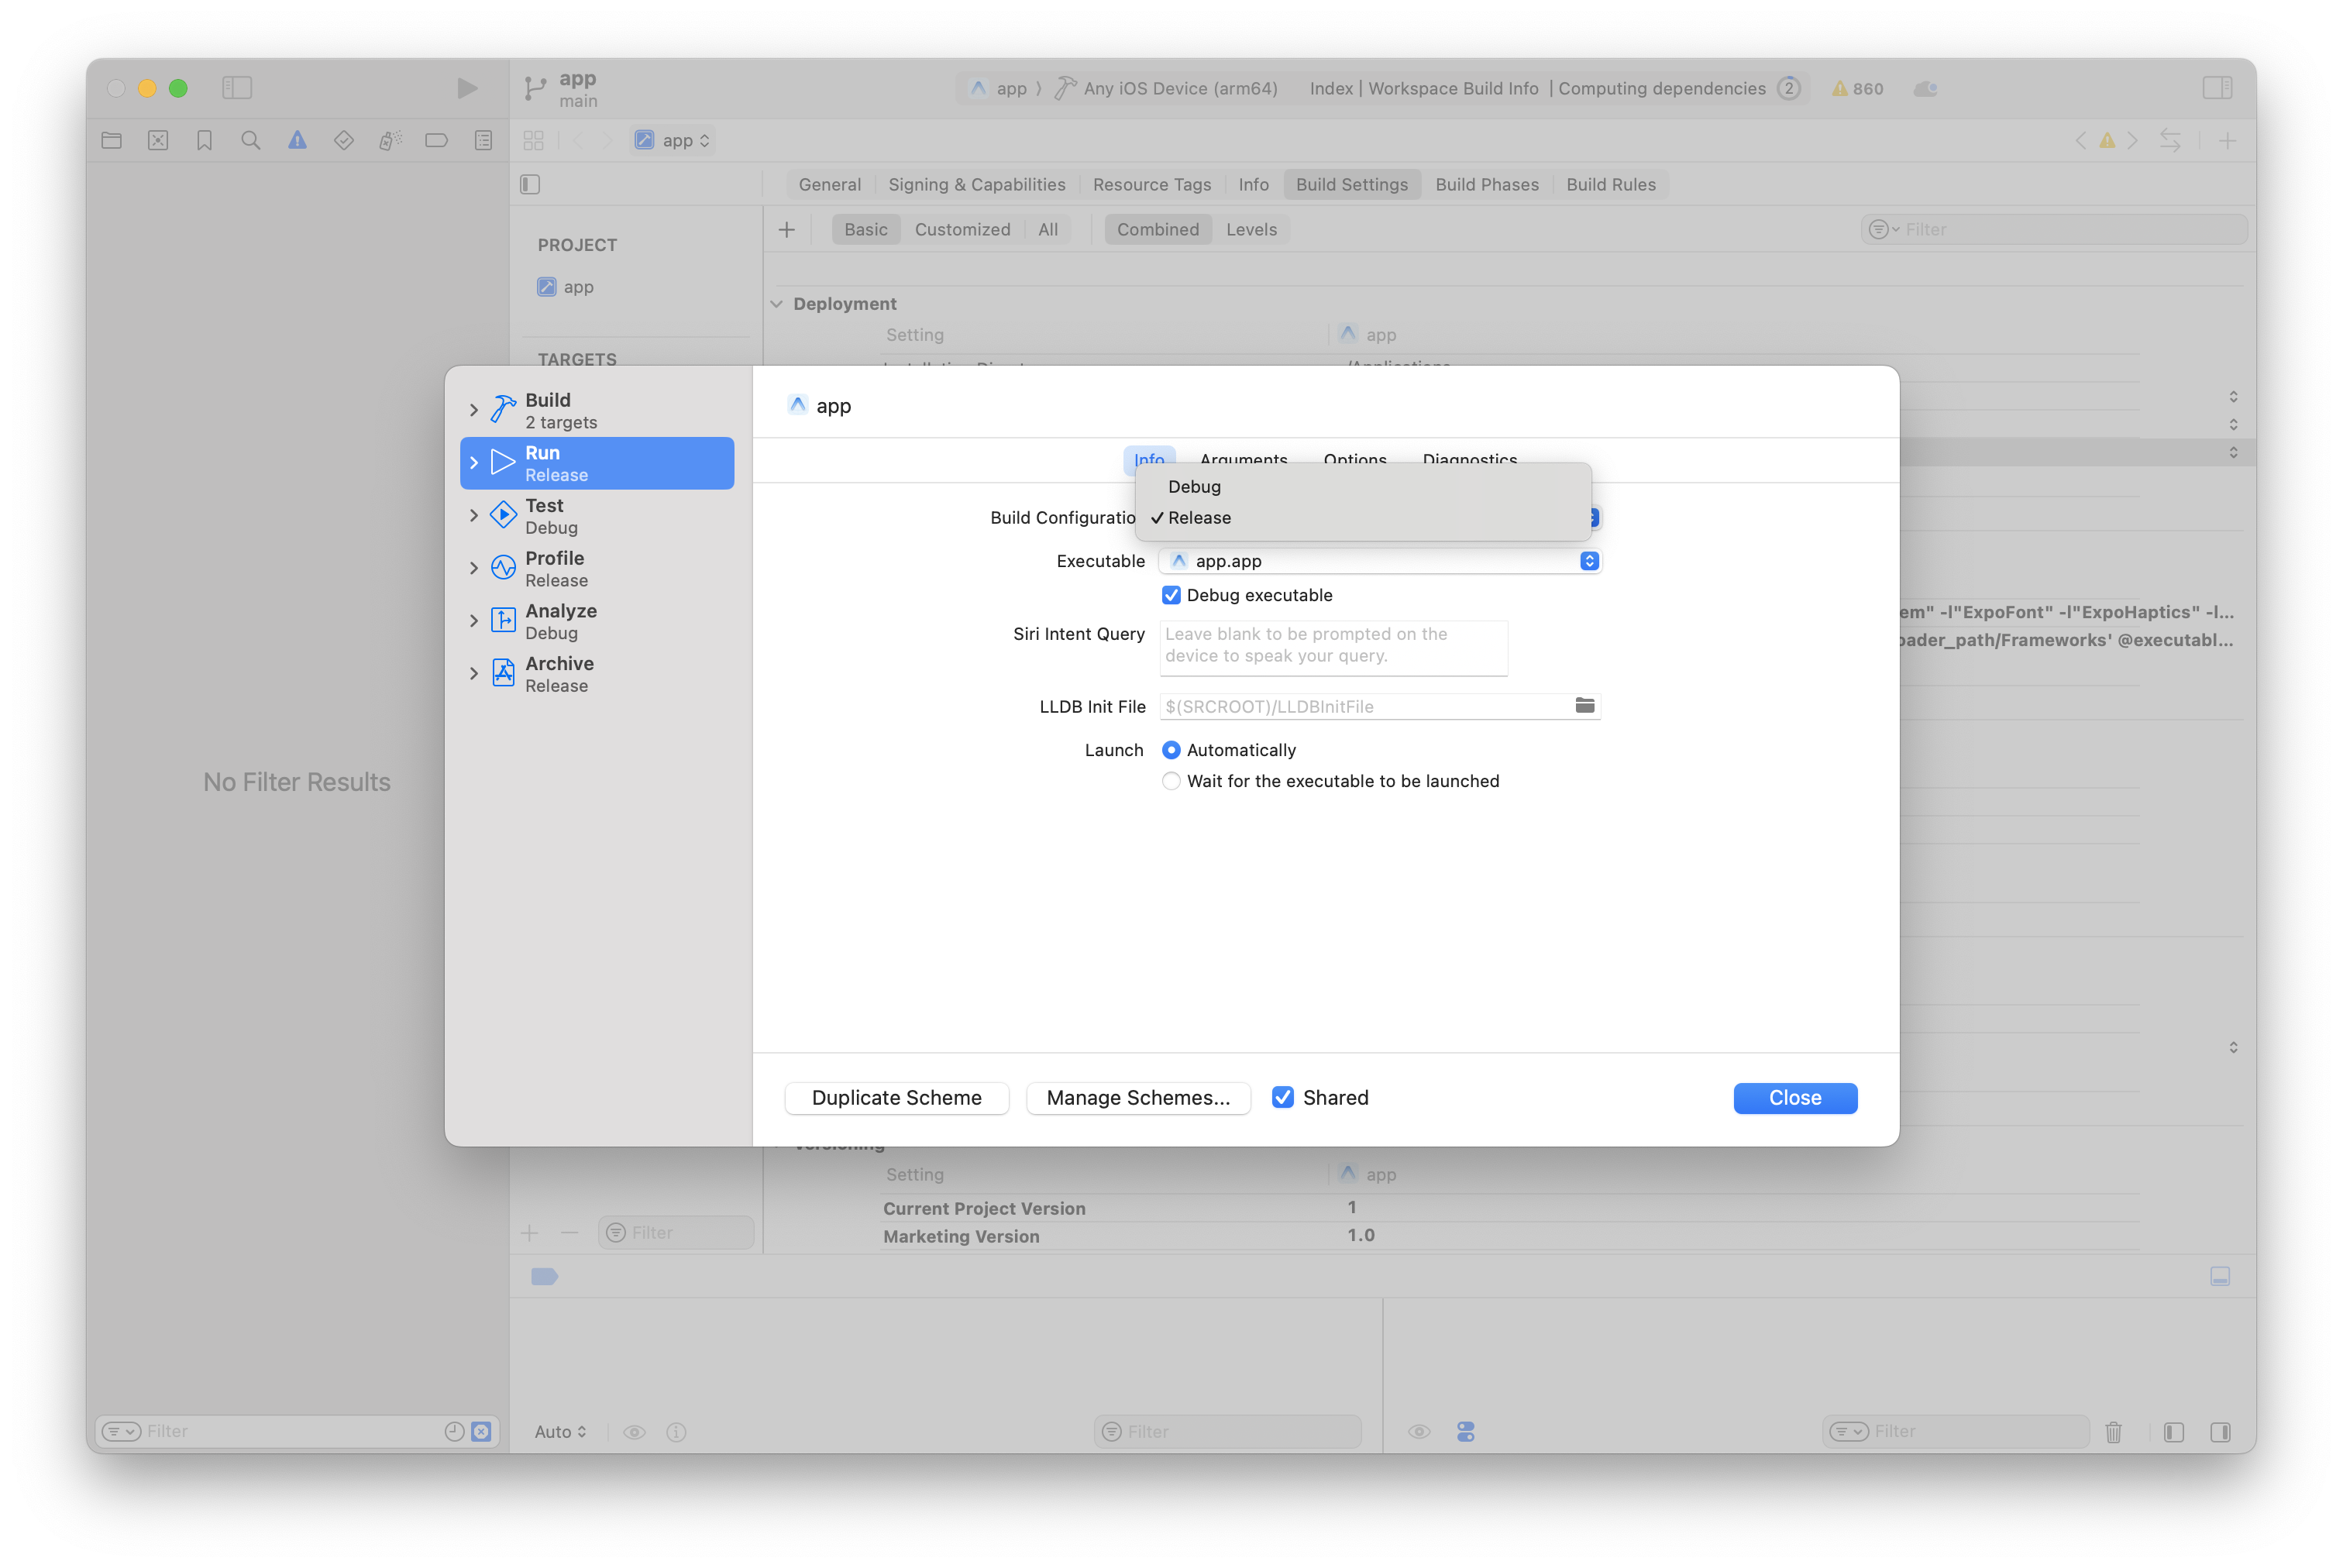
In the navigation bar, click app under app ▸ iPhone, choose Edit Scheme, and change Debug to Release. If this step is not done, it seems the JS Bundle will not be packaged into the app.
Then comes the moment to witness a miracle. Click the run button in the upper-left corner, and Xcode will start compiling, packaging, and installing to the real device. This process takes quite a while, so wait patiently.